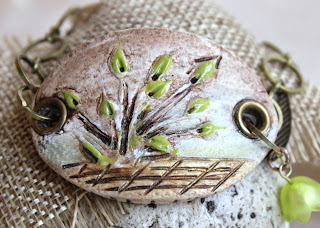
The easy-to-follow steps instructions make this bracelet tutorial a true example of the versatility of polymer clay in DIY jewelry.
With the oval symmetry and some texture finishing and optional accessories, this polymer clay bracelet will catch everyone's eyes.
MATERIALS:
- A Picture or Image of your choice (line art preferable)
- Blank Stencil Surface (to hold the design)
- Polymer Clay Conditioning Machine (or Pasta Machine)
- Fine Tip Marker or Fine Sharpie Pen
- Dimensional Paint
- EasyMold Silicone Putty (recommended)
- Polymer Clay
- 2" Oval Cookie Cutter
- Acrylic Paints
- 2ea Jewelry Grommets
- Scratch Awl or Scriber Needle Modeling Tool
- 12oz. Soda Can (not empty)
- Link Chain Of Your Choice ( or Faux Suede, Ribbons, etc. )
Difficulty Level: Medium
Time to Complete: In an evening
INSTRUCTIONS:
Use a sharpie marker and draw your design (line art) on the blank stencil. This drawing will be your guide to apply the dimensional paint in the next step. (the image shows an Owl line art, but the process is the same)
STEP #2:
Now, we are going to trace the lines with the dimensional paint. Apply a thin amount on areas where the line is thin and more paint in areas where the lines are wider.


Depending on the design you choose, you will have something similar to the figure above. (the design used here is an Owl, not a Fox)
STEP #3:
Prepare the polymer clay base. Using a small amount of clay, make a little ball of about 1-1/2" inches. Follow up the manufacturer's instructions to achieve the correct consistence.Set your pasta machine to #3 and pass the clay through the machine several times until you get a smooth large piece.
Bend the clay in the middle and repeat the step above, until you get a very clean and smooth one solid piece. It should be about 1/8" thick.
Using a 2" oval cookie cutter, place it over the clay and make a clean cut.

You should get a clean and smooth cut!!
Use your scratch awl (or a scriber needle) and make a hole on each extreme of the clay oval, 1/8" from each border. Make sure they are aligned correctly. Later we will be adding the two grommets on these holes.
STEP #4:
It is time to make our mold using the silicone putty. (you can use any other silicone putty, but I strongly recommend the brand shown below).
Take a small amount and make a ball of approximately 1" of each components and mix them together, following the manufacturer instructions.
WORK QUICKLY AND DO NOT LET IT DRY!!!!
Once you get the 2 parts properly mixed, place the silicone putty on top of your dimensional image. Press firm over the image with your hand or better yet use a flat surface to get a better, more uniform deep impression.

When the silicone putty is completely cured, you should have a negative image like the one shown below. Nice, right?
STEP #5:
Place the cured silicone putty on top of the polymer clay and press it down firmly (again, you can use a flat surface on top of it instead of your fingers) in order to get a "positive image" over the polymer clay.
Using different items with textures (like a piece of canvas), we will make some texture effects on the clay. I am using the tip of my brush to press the canvas on the oval clay.
You should get some nice details as shown below.

Now, I going to make some more details of my owl, like the eyes for example.
For this Owl bracelet, I am placing two small crystal beads for the eyes. It is important to use beads or objects that can hold 150 degrees in a toaster oven or a polymer clay craft oven.
Place your oval clay on a 12oz aluminum soda can (unopened), and bend it, so it takes the curved shape of the can.
At this point, you might begin to create other image details, like the nose in this case, and any other details as well.
Leave the oval clay laying on the soda can and carefully, insert the two jewelry grommets on each of the holds previously made.
Press them down slowly until they get immersed into the clay, but leaving the recessed part visible as you can see on the picture above.
Without removing the clay from the soda can, clean any excess with a tooth stick. Do not remove the oval clay from the soda can yet!!
Place the can with the oval clay in a toaster oven for about 10 minutes at 150 degrees (or longer/shorter depending on your polymer clay baking instructions).
STEP #6:
Once the clay is totally cured, begin to paint the image, starting with a base color and then the accent colors.
Using a wet cloth, remove any excess of paint from the areas you do not want it.
Finally, add the chain of your choice and... Voilà ! You will have a beautiful one-of-kind polymer clay owl bracelet to wear or give as a present!!
Below, I am showing you my finished Owl Polymer Clay bracelet and a Fox Polymer Clay Bracelet.
Below are some more finished designs I made using the same technique detailed in this tutorial.

As you can see, the possibilities are endless!!
====================================================================
I hope you have enjoyed this tutorial and keep in touch with me for more easy-to-do tutorials!
You can visit my Etsy Shop at www.ZiriasCreations.Etsy.com for more handmade polymer clay jewelry and a nice selection of Necklace Pendants, Earrings, Resin Pendants, and more!!!


